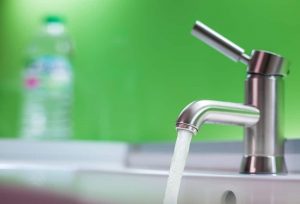
Where is The Diverter in A Kitchen Faucet

The diverter in a kitchen faucet allows water pressure to switch from the main spout to the faucet nozzle. Sometimes the spout stops working, which can be due to a problem with the diverter.
Whether you need to troubleshoot a problem, such as a kitchen faucet diverter making a thumping sound, or are just curious about its location, we can help you find it. Read on for a quick guide on how to find a kitchen faucet diverter.
What Is A Kitchen Faucet Diverter?
The function of a faucet diverter in your kitchen is to direct water from the faucet spout to the faucet sprayer. By squeezing the trigger on the sprayer, you tell the water pressure inside the faucet to drop, which engages the diverter. This restricts the flow of water from the spout and transfers it into the sprayer.
How Do I Determine Where The Diverter Is Located?
The diverter for kitchen faucets is usually located near the front of the faucet body. However, in some faucets, the diverter faces the back. If you are not sure where the diverter is, the sink manufacturer may have a kitchen sink diverter valve diagram that may be helpful.
To find the diverter, you will need to first turn off the water supply to the faucet you are repairing. Turn the faucet handle to the on position and test to see if the water will give you a temporary bath.
There may be some water left in the hose, but it should be a trickle. Once there is no more water in the faucet, congratulations, you have successfully turned off the water and now you can go ahead and remove the faucet.
What You Will Need
To find the diverter for your kitchen faucet, you will need.
- Hexagon wrench or Allen wrench
- Sharp-nosed pliers
- Silicone faucet grease

Step 1: Remove The Handle. Start by removing the handle of the faucet. You will need to loosen and remove the set screw, which is usually at the bottom of the handle of a single-handle faucet.
Sometimes, the screw is hidden by a decorative cover that you can pull off. Using a hex wrench or Allen wrench, remove the set screw and pull out the handle.
Step 2: Finding The Diverter: Next, you need to loosen the faucet cover by turning it counterclockwise. The faucet cover is a dome-shaped cover. You should be able to turn it by hand, but if you can’t get the valve cover loose, put a piece of cloth on it to avoid damage, then clamp it in place with pliers.
When you lift it up, move the diverter back and forth to gently remove it. The diverter should be nestled in front of the faucet body, but in some models, it may be in the back.
Step 3: Clean Or Replace. To clean or replace the diverter, use sharp-nosed pliers to gently remove the sink faucet diverter from the faucet body. If the diverter is clogged with mineral deposits, you can soak it in vinegar to break down the dirt. After soaking for a while, use a small brush to carefully remove the deposits from the faucet body where the diverter is located.
If you need to replace the diverter, you will need the correct replacement parts. To reinstall or replace the diverter, carefully push it into the faucet body with your fingers. Lubricate the rubber O-ring in the faucet body with silicone faucet grease, then push the spout onto the faucet.
Tighten the faucet cover and reinstall the handle with the set screw. Put the trim cap back on the set screw.
Step 4: Turn On The Water. If you have to turn off the main water supply, hopefully you have not left anyone stranded in the bathroom. Once you have the faucet back in, open the water supply shut-off valve. Test the faucet and sprinkler head to make sure you replaced everything correctly.
 ARCORA FAUCETS