How to Repair Low Water Pressure in A Kitchen Faucet
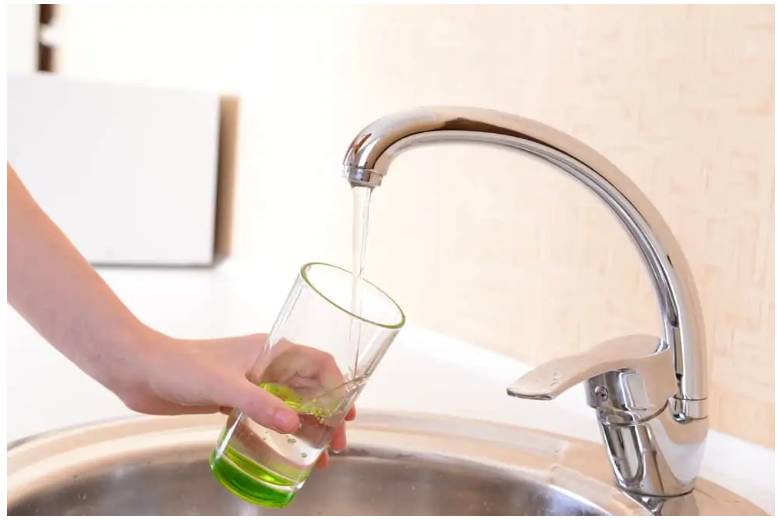
Is your tap spitting out low water pressure? When it’s working properly, you may not even notice. But when it’s not working properly, something as simple as washing dishes can be frustrating. Low water pressure is a common (and annoying) plumbing problem.
The kitchen tap is a workhorse and one of the most important fixtures in the home.
The good news is that it is a common problem that is easy to fix most of the time. You can do this! Yes, you can, and we can help you solve the problem. This article will help you to identify the problem and get the water flowing properly from your taps.
Is The Low Water Pressure In The Kitchen Or Throughout The House?
The first step is to find out exactly why your water pressure is too low. If you don’t mind rolling up your sleeves and doing some detective work, you will be able to fix your kitchen sink problem in less time than it would take to find a plumber.
If the pressure is low on one side of the tap, or only in the kitchen – follow the steps below to determine the source. If the problem is occurring throughout the house or in multiple installations, skip straight to the next section.
Low Water Pressure In The Kitchen Only
If you are only experiencing low water pressure in the kitchen, then the problem is with the fixture itself, not the pipes or plumbing. This is usually one of three problems.
- Clogged Aerator – The aerator is a small screen attached to the spout of the sink. The aerator mixes the water with the airflow to reduce the water flow.
- Faulty Cartridge – A leak can be caused by a worn o-ring and cartridge, reducing the water pressure. If you have a new tap, sometimes debris can also get stuck in the cartridge during installation.
- Clogged Pull-out Spray Nozzles – Pull-out spray nozzles can also have problems with the hose or the spray nozzle itself. People who live in hard water areas will find that mineral deposits can clog the spray head.
How To Check A Pull-Out Spray Nozzle (If You Have One)
If you have a kitchen tap with a pull-out spray head, such as the Moen Arbor Single Handle Pull-Out Tap or the Delta Tap Linden Single Handle Tap, you may want to check it first.
Follow the steps below to check that the pull-out spout is not clogged.
What you need.
- Your hand
- vinegar
- warm water
Remove the spray nozzle from the hose and turn on the tap. If the pressure is sufficient, then mineral build-up in the spray nozzle is likely to be the problem. Clean it with a 1:1 solution of vinegar and water and test the tap.
How To Check The Aerator
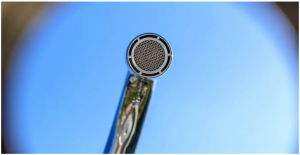
Aerators are easy to access. Before you start, block the drain to avoid parts falling into the sink and put a cloth somewhere to hold the parts.
What you’ll need.
- Pliers
- Cloth
- Duct tape
- Vinegar
First, remove the aerator. Wrap tape around the jaws of the pliers so that the surface of the tap is not damaged. Next, unscrew the aerator. It should come off easily.
Now test the faucet; if the water flows normally, you have found the problem. If the pressure is still too low, go to the next step. If not, dismantle the aerator and clean it. Try cleaning the screen with a vinegar solution and a toothbrush.
If it’s really caked in there, you can boil it or let it soak in a strong vinegar solution for 45 minutes and try again. Once you have scrubbed it, put the aerator back in
How Do I Unclog The Cartridge In My Tap?
If the aerator is not the problem, then the cartridge is the next best place to look. But how do I know if my faucet cartridge is broken? It’s easy to find out once you’ve removed it. If the cartridge or seal is bad, it will cause a leak and reduce the pressure.
As always, block the drain to avoid dropping anything underneath.
What you will need.
- Flathead screwdriver
- Allen spanner
- Box spanner or adjustable spanner
- Rag
First, turn off the hot and cold water supply lines under the sink. Make sure they are closed. Remove the tap handle using a flat head screwdriver and/or an Allen key. How you dismantle it depends on how the tap is assembled.
Then remove the spool. It is a good idea to take a photo of the cartridge before taking it apart. Once it has been removed, inspect the cartridge and gasket for damage or build-up. You should be able to tell if it is clogged by looking at it.
Clean the cartridge thoroughly and reassemble the tap. Turn the water back on and test the water pressure.
Low Water Pressure Throughout The House
The water pressure in the communal plumbing is above 80 PSI most of the time, sometimes as high as 140 PSI. this is too high for efficient use in most homes and the pressure tends to fluctuate. Although the average house has a water pressure between 30 PSI and 80 PSI, for safety reasons, it is against code if it exceeds 80 PSI.
If you are experiencing low pressure in all your taps, it could be a mains pressure valve (PRV) or a pipe leak. First, ask your neighbors if they have the same problem and if so, you will need to contact your municipal water district office. Otherwise, continue with the next step.
Check The Pressure Regulating Valve (PRV).
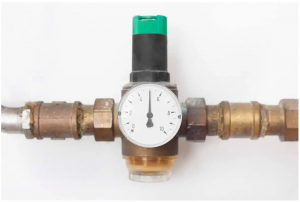
The water pressure regulating valve (PRV) is part of the water meter assembly. It is a brass fitting and is usually located near the main shut-off valve, where the main water line enters the house. Most PRVs have a locking nut which you can turn to increase or decrease the water pressure.
Pressure-reducing valves are responsible for reducing high water pressure and leveling out the flow of water entering your home to ensure even water pressure. Although a pressure-reducing valve keeps the water flowing at a constant pressure level, if it becomes blocked or fails, it can lead to low water pressure. And a broken pressure-reducing valve can lead to serious and expensive plumbing problems.
What you will need.
- Spanner or vice grips
- Screwdriver
To check the water pressure at the PRV, find the locking nut. To reduce the pressure, turn it clockwise. To increase the pressure, turn it counterclockwise. Be very careful when increasing the pressure. If you turn it too high, you could blow a pipe. If this does not solve your problem, go to the next step.
Use A Pressure Gauge To Check For Leaks In The Pipework.
If it’s not the pressure-reducing valve, it could also be a leak. Any leaks in the plumbing system, whether internal or external, will reduce the water pressure throughout your house. Not only will this increase your water bill, but it can lead to more serious plumbing problems.
What you will need.
- A water pressure gauge
- An outdoor plumbing tap with a gate valve.
Firstly, turn off the main water supply to the house. This is usually found in the garage or crawl space. Make sure the water is turned off by testing your tap.
Next, connect the water pressure meter to the water spigot connected to your house. Turn the gate valve to the closed position. Now, look at the indicator. If the PSI starts to drop, you have a leak. If it stays at 80, leave the water pressure gauge on for 5-15 minutes and see if it moves. If it drops, you have a leak.
Using A Water Meter To Check For Leaks
The water meter is usually located near the edge of your street or in a specific part of your property. In most homes, the water meter is buried in a box in the earth, but there are also freestanding ones. Newer water meters will have a digital display, while older meters will have a dial.
Find the meter and if it has a cover on the face, remove it. If there is a leak, the newer meters will have a tap leak sign. On older water meters, if the pressure is dropping, the dial will spin.
Summing Up
Hopefully, you will be able to isolate the problem and solve it yourself. Often it is an easy problem to solve, but in some cases, you may have to deal with a bigger problem. If you have gone through all the steps and still cannot diagnose the problem, then it may be time to call a plumber.
Similarly, if you do find a leak, you may want to call a professional. Water leaks can lead to expensive damage if they are not properly repaired. Even if you end up paying for the repair, you can still save money in the long run. Most plumbers will offer both leak detection and leak repair services.