How To Fix A Hole In A Porcelain Sink
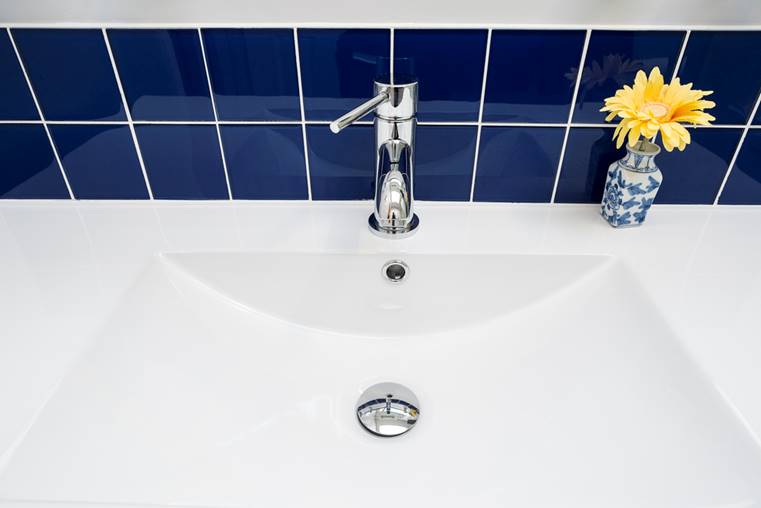
Porcelain sinks are a beautiful, timeless addition to many kitchens and bathrooms. Unfortunately, however, porcelain sinks are prone to cracks and holes. Defects in the porcelain coating can expose the metal hidden beneath, making it susceptible to rust and corrosion. Even just a small crack or chip in a sink can result in a hole that can ruin the sink’s flawless appearance.
Fortunately, small holes in porcelain sinks are easy to repair. Bonus: You can buy a porcelain repair kit that has the major parts you need to fix a hole in a porcelain sink. Having a repair kit is one thing, knowing what to do is another. We’ll help with that part.
Can You Fix A Hole In A Porcelain Sink?
Yes, you can quickly fix a hole in a porcelain sink. Of course, there are some limitations. For example, if the sink ends up being drilled with a hole in the metal and all, you will have a tough time trying to fix it. If that’s the case, you’re probably better off replacing the sink. Also, we’re not quite sure how this could happen unless a hole was drilled in the sink on purpose.
Or, if you’re dealing with a large hole in your sink, you may also have a difficult time repairing it. If it’s a large hole, you might consider replacing the sink. However, if you feel confident, you can try to fix it with a repair tool.
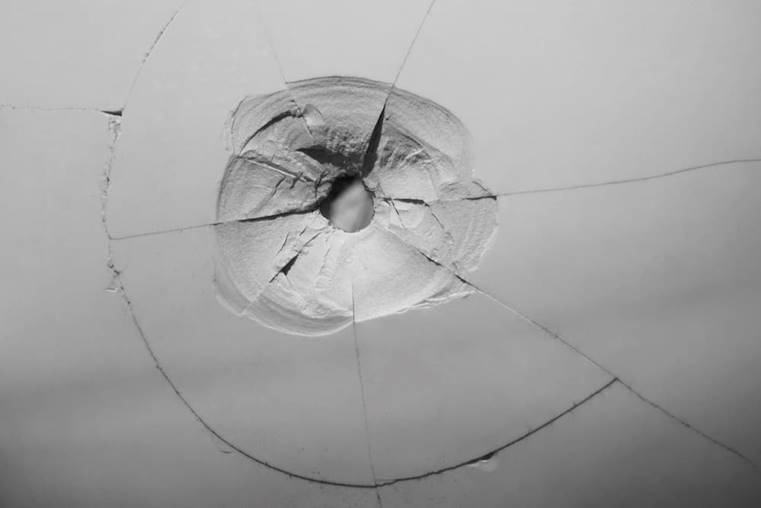
Therefore, for the purpose of this article, we will assume that there is a small hole in the sink that exposes the metal. Once you can see the metal in your porcelain sink, you need to deal with the problem quickly because if you let it rust and corrode, it will happily take over.
How Do I Fix A Hole In My Porcelain Sink?
We’ll discuss each step in depth so you’ll feel confident in your ability to fix your sink (hopefully). So, without further ado, let’s get started.
Here’s what you’ll need.
- Porcelain repair tools
- Fine grit sandpaper
- Soft cloth
- Acetone
- Porcelain tile and tongue depressor (if necessary)
- Respirator mask (if applicable)
- Small paintbrush (if preferred)
- Straightedge
- Cotton swabs
Yes, we know there are a few “maybe’s” in the list of necessary (maybe) items. We’ll discuss this later, we promise. Also, when you choose a porcelain restoration tool, choose one that matches your sink (i.e. color, texture and gloss/matte).
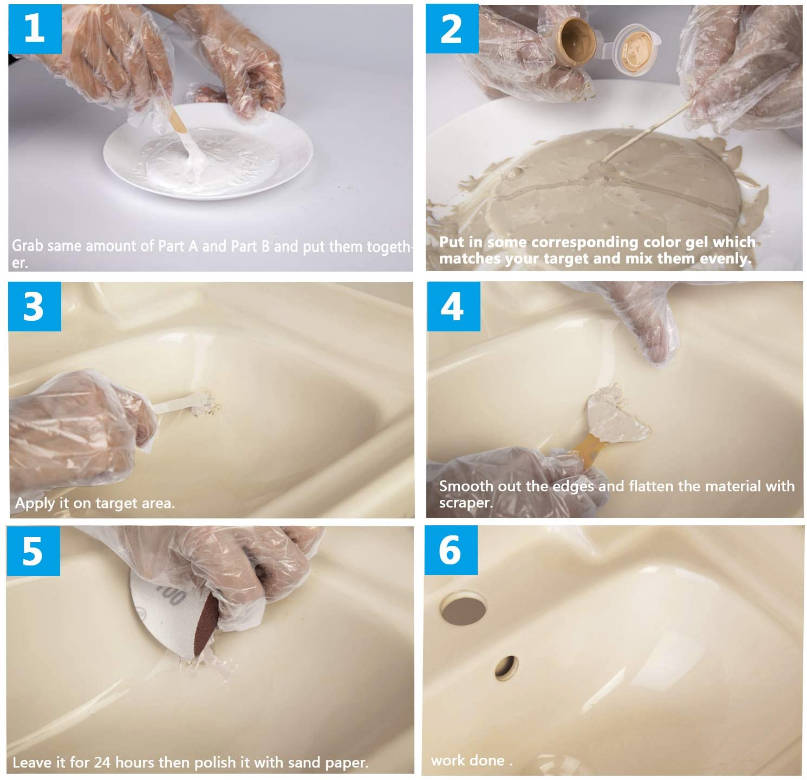
Prepare The Surface
Start by preparing the surface of the sink and around the hole. Before you apply the compound, you need to properly prepare the area so that it will adhere properly to the sink.
To prepare the surface, make sure the area is completely smooth, dry, and free of dust/particles. Basically, if it’s not clean, clean it. Use fine sandpaper to smooth out any rough areas if necessary. Since you will create fine dust during the sanding process, wipe it with a soft cloth.
Using a soft cloth soaked in acetone, wipe the area around it. This will help ensure the area is clean. Or, if you don’t have acetone on hand, you can use soap and water. Allow the area to dry completely before you start mixing and applying the compound. If you don’t, the restoration may not adhere properly.
Mixing Restoration Compounds
Some porcelain restoration kits require you to mix the compound. The kit should have specific instructions and safety guidelines, so be sure to follow them. Sometimes the kit does not provide a container for mixing the compound.
Tub, Tile and Shower Repair Kit (color match), 3.7 oz. Fiberglass Repair Kit, Porcelain Repair Kit…
- FIBERGLASS REPAIR KIT – Repairs chips, scratches, dents, dings and holes. Suitable for fiberglass and porcelain repair.
- PERFECT COLOR MATCH – Matches white, arctic, milk-white, dune, cookie, strong tea, almond, flax, etc.
- NON-TOXIC AND ODORLESS – Our fiberglass restoration kits are made with nanotechnology and are safe for children and teens.
- 5 YEAR DURABILITY GUARANTEE – Provides great adhesion in just a few easy steps. Water and Moisture Resistant.
If not, that’s what random tiles and tongue depressors (or craft sticks, just something to mix with) are for. Using clean porcelain tiles and sterile tongue depressors (or unused craft sticks) helps avoid contamination. Depending on the kit you choose, you may need to wait a few minutes for the compound to rest before continuing.
Wear a respirator while you mix the compound. Complete the process in a well-ventilated area to protect yourself from fumes.
Begin Repairs
Once you are ready, apply the compound. Most kits come with an applicator, but you can also use a small brush if you prefer. Apply the compound in layers and let it seep into the holes. Let each layer dry before you start the next one. After you have filled the hole with the patch, let it dry.
When finished, use a straightedge to remove the excess and create a flat surface. If necessary, use fine sandpaper to create a smooth, seamless surface. Acetone can help remove rough spots from the edges of the hole. If necessary, dip a cotton swab in acetone and wipe the rough spots.
Finally. Paint
Once the repair is complete, the final step is to paint. While some repairs do not require painting (the smallest cracks or small holes), you may want to paint. This part is easy since you have chosen a repair kit that matches the color and gloss (or matte) of your sink.
Simply apply paint to the repair to create a nice, seamless transition. Let it dry completely. And just like that: ta-da, you’re done! What hole in the bathroom sink?