 ARCORA FAUCETS
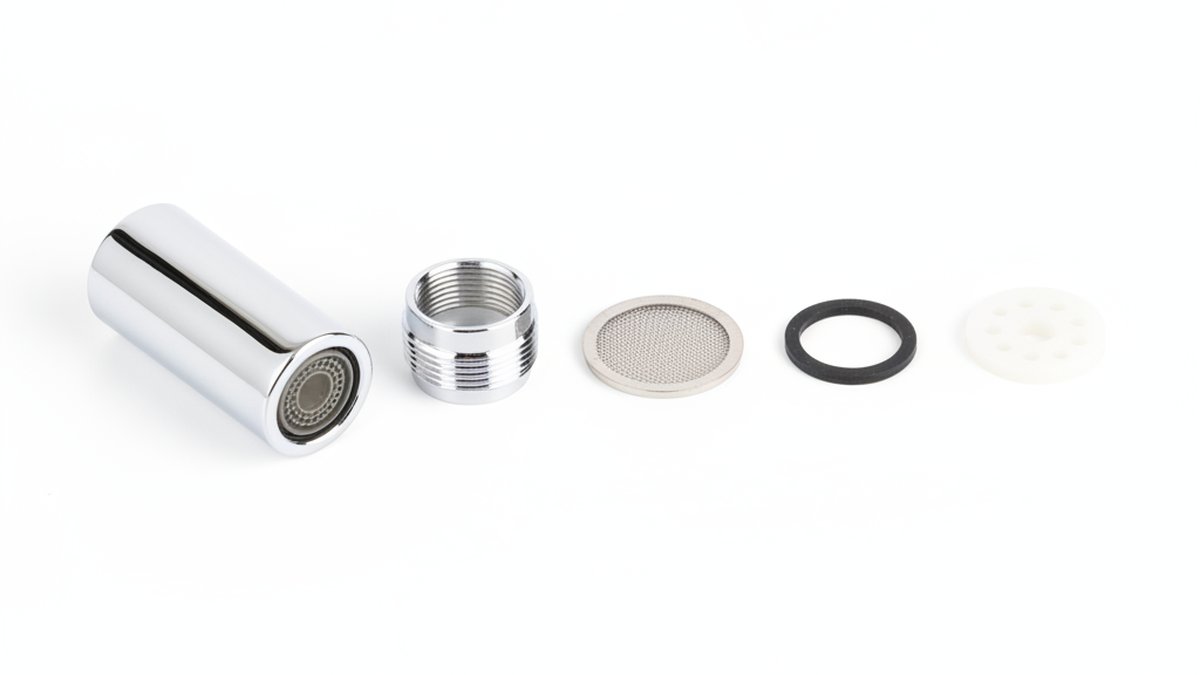
If your sink trickles, sprays sideways, or spits out grit, a bathroom faucet head replacement is almost always the fastest, cheapest fix — and one you can finish before your coffee gets cold. On a bathroom faucet, the “head” people mean is the tip that water actually comes out of: the aerator (that little mesh-and-housing insert screwed into the end of the spout). Sometimes it means the removable spray head on a pull-down bathroom faucet, but most standard basin taps just have an aerator. Get the thread and size right and it snaps back to full, straight, quiet flow.
Below, we’ll walk through exactly what the “head” is on your faucet, how to remove one that’s stuck, how to pick the right replacement, and the handful of situations where replacing the head won’t cut it and you should swap the spout or the whole faucet instead.
What exactly is the “head” on a bathroom faucet — the aerator, the spout, or something else?
On 90% of bathroom faucets, the “head” is the aerator — the screw-in tip at the very end of the spout. It’s a small housing holding a fine screen and a flow restrictor that mixes air into the water so it comes out soft, straight, and splash-free instead of as a hard jet.
There are three parts people casually call the “head,” and knowing which one you have decides your whole repair:
- Aerator — the removable tip. This is what clogs, sprays crooked, or drips. 95% of “faucet head” problems live here, and it costs $3–$12 to replace.
- Spray head — only on pull-down/pull-out bathroom faucets. It’s the wand you pull toward you; it clicks between stream and spray. Replaceable as a unit if the button sticks or the hose leaks.
- Spout / spout tube — the curved metal body the water travels through. You replace this only if it’s cracked, corroded through, or the threads that hold the aerator are stripped.
How do you tell if you just need a new aerator or a whole new faucet head?
Replace just the aerator if the flow is weak, uneven, or sputtering but the faucet body is solid — this fixes the vast majority of complaints. Replace the whole spout or faucet only when the metal itself has failed. Here’s the quick decision:
| Symptom | Most likely cause | What to replace | Rough cost |
|---|---|---|---|
| Weak or low flow | Clogged aerator screen (mineral scale) | Clean or swap the aerator | $0–$10 |
| Water sprays sideways / splits | Debris or torn screen in the head | New aerator | $3–$12 |
| Grit or black flecks in water | Broken screen / pipe sediment | New aerator | $3–$12 |
| Drips from the tip after shut-off | Worn cartridge (not the head) | Cartridge, not aerator | $8–$25 |
| Aerator threads stripped / won’t seat | Corroded spout tip | Whole spout | $25–$70 |
| Cracked or green-corroded spout | Metal fatigue / hard-water rot | Whole faucet | $60–$250 |
Notice a key trap in that table: if water drips from the tip after you shut the handle, that’s not a head problem at all — it’s a worn valve cartridge inside the faucet body. Swapping the aerator won’t help. That’s a different, still-DIY repair, and the same logic applies to loose or wobbly controls, which you can sort out by learning how to change bathroom faucet knobs without a plumber.
How do you remove a bathroom faucet head that’s stuck or corroded?
Try to unscrew it by hand first — most aerators come loose with firm finger pressure counter-clockwise (as you look up at the spout). If mineral buildup has cemented it on, wrap the head in a cloth to protect the finish, grip with pliers or an adjustable wrench, and turn gently. If it still won’t budge, soak it in white vinegar to dissolve the scale before trying again.
Step by step:
- Close the drain or lay a towel in the basin so no small parts vanish.
- Twist counter-clockwise by hand. Standard male-thread aerators (housing sits inside the spout) and female (housing sits outside) both loosen the same direction.
- Stuck? Protect and grip. Wrap the head in a rubber band, cloth, or masking tape, then use pliers. The wrap prevents chewing up a brushed nickel or matte black finish.
- Still frozen? Dissolve the scale. Soak a paper towel in white vinegar, wrap it around the joint for 30–60 minutes, then retry. Hard-water calcium is the usual culprit — the same stuff you fight with a hard water stain remover for taps.
- Note the parts as they come out — housing, screen, rubber washer, restrictor. Their order and orientation matter when the new one goes in.
If you’re battling seriously seized metal — the whole tip won’t turn — the same penetrating-and-patience technique in our guide on how to remove an old tap spindle that’s stuck applies to spouts and heads too: heat, penetrating oil, and steady leverage beat brute force every time.
Which replacement head fits my faucet — how do I match the thread and size?
Match three things: thread gender (male vs. female), thread diameter, and the aerator style. Take your old head to the store or measure it — bathroom aerators are smaller than kitchen ones, so a kitchen part won’t fit. The most common bathroom sizes are listed below.
| Aerator type | Where the threads are | Common bathroom size | Best for |
|---|---|---|---|
| Male (regular) | Threads on the outside of the insert; sits inside the spout | M18.5 × 1 | Most modern basin faucets |
| Female (regular) | Threads inside; screws over the spout | M22 × 1 or M16.5 × 1 | Older / European taps |
| Junior / small | Compact housing | M16.5 × 1 | Slim modern spouts |
| Cache / hidden | Recessed, needs a key | Varies by brand | Designer faucets |
Two quick tests if you’re not sure: if you can see threads on the outside of your old aerator, you need a “male” replacement; if the threads are hidden inside, you need “female.” And bring the old part with you — a $4 universal aerator kit at the hardware store usually includes several sizes plus washers. For the deeper mechanics of what’s inside that little housing and how to reassemble it correctly, our breakdown of the faucet aerator internal parts shows exactly how the screen, restrictor, and washer stack up.
Flow rate matters too. Bathroom faucets in the U.S. are capped at 1.5 gallons per minute (GPM) by EPA WaterSense standards (some states like California require 1.2 GPM). Aerators are stamped with their GPM — pick one that matches or beats what you had so you stay compliant and don’t lose pressure needlessly.
Should you replace the whole spray head on a pull-down bathroom faucet?
Yes — if you have a pull-down or pull-out bathroom faucet and the spray button sticks, the wand leaks, or the stream/spray toggle fails, replace the spray head as a complete unit rather than fussing with tiny internal springs. Order the model-specific head from the manufacturer so the quick-connect and hose fitting match.
These heads unclip from the hose with a simple push-collar or unscrew at the connector. The process mirrors a kitchen swap almost exactly, so our step-by-step on how to install a kitchen faucet head correctly (and when to just replace the whole spray head) translates directly — same quick-connect logic, same “clean the threads and use plumber’s tape” habits.
One caveat: pull-down heads are rarely universal. A generic head may not seat on your hose’s quick-connect, and a poor fit leaks under the counter. When in doubt, buy the OEM part for your faucet model.
What does a bathroom faucet head replacement cost — DIY vs. calling a plumber?
DIY costs almost nothing: $3–$12 for an aerator, or $15–$45 for a pull-down spray head, and about 5–15 minutes of your time. A plumber will charge a $75–$150 service call for the same job — so unless the spout is cracked or you’re replacing the entire faucet, this is a clear do-it-yourself win.
Here’s how the numbers shake out:
- New aerator (DIY): $3–$12 in parts, 5 minutes. No tools required in most cases.
- Pull-down spray head (DIY): $15–$45 OEM part, 10–15 minutes.
- Whole spout (DIY): $25–$70, 20–30 minutes, needs a basin wrench sometimes.
- Plumber service call: $75–$150 minimum just to show up, plus parts.
- Full faucet replacement: $60–$250 fixture + $150–$350 labor if you hire out.
How do you stop the new faucet head from clogging again so fast?
Attack the root cause: hard water. If your aerator clogged within a year, minerals in your water are the reason, and a new head will clog just as fast unless you either soften the water, clean the head every few months, or add a filter. Prevention beats repeat replacement.
Practical habits that keep a fresh head flowing:
- Unscrew and soak the aerator in vinegar every 2–3 months if you’re on hard water. Ten minutes dissolves the scale.
- Flush the line before reinstalling a new head — run the faucet 10 seconds with the aerator off to clear pipe sediment that would otherwise lodge in the fresh screen.
- Consider point-of-use filtration. A faucet water filter for a bathroom sink cuts the sediment and some minerals that clog aerators and stain the basin.
- Wrap threads with a single layer of plumber’s tape (PTFE) on reinstall so the head seals cleanly and comes off easily next time.
If you’ve also lost the little decorative cover at the base of your spout or handle during a repair, that’s a separate easy fix — see what a bathroom faucet cap is and how to replace a cracked or missing one.
FAQ
Can I replace a bathroom faucet head without turning off the water?
Yes — for a standard screw-in aerator you don’t need to shut off the supply, since you’re only working on the tip outside the valve. Just make sure the faucet handle is closed. For a pull-down spray head or a whole-spout swap, shut off the two supply valves under the sink first, because those jobs open the pressurized water path.
Are bathroom faucet aerators universal?
No, not fully. Aerators come in male or female threads and several diameters (commonly M18.5×1, M22×1, and M16.5×1 for bathroom taps). “Universal” kits include a range of sizes and adapters, but you still have to match your specific thread. The safest move is to bring your old aerator to the store or order the size printed on it.
Why is my new faucet head still low pressure after replacement?
If a brand-new head still trickles, the aerator isn’t the bottleneck. Check the flow restrictor (you can remove it if legal in your area), then look upstream: partially closed shutoff valves, a clogged supply line, or a failing cartridge. Whole-house low pressure points to the plumbing, not the head.
How often should I replace a bathroom faucet aerator?
An aerator can last 5–10 years if you clean it. On hard water, plan to soak it in vinegar every few months and replace it only when the screen tears or the housing corrodes. There’s no fixed schedule — replace it when cleaning no longer restores full, straight flow.
What size wrench do I need for a bathroom faucet head replacement?
Usually none — most aerators unscrew by hand. If one is stuck, a small adjustable wrench or slip-joint pliers wrapped in a cloth handles it. For hidden “cache” aerators, you’ll need the brand’s plastic aerator key, which typically ships with the faucet.
Can hard water damage cause a faucet head replacement to fail early?
Yes. Calcium and magnesium scale is the number-one reason aerators clog and heads spray crooked. A replacement in a hard-water home will clog again within months unless you clean it regularly, soften the water, or add filtration. Treat the water and the new head lasts far longer.
The bottom line
A bathroom faucet head replacement is one of the most satisfying five-minute plumbing wins there is: unscrew the old aerator or spray head, match the thread size, screw on the new one, and enjoy full, quiet, splash-free flow again. Save the plumber’s number for cracked spouts and internal cartridge leaks — the head itself is squarely DIY territory. Match the size, mind your water hardness, and you’ll rarely think about it again.
Author note: This guide was written by the Arcora Faucet product team, drawing on hands-on installation testing across dozens of basin faucet models and aerator types.
About Arcora: Arcora designs and manufactures kitchen and bathroom faucets, shower systems, and fixtures built to modern flow and durability standards. Our faucets are tested against ANSI/NSF 61 and ASME A112.18.1 performance benchmarks, ship WaterSense-aligned aerators, and are backed by a limited lifetime warranty on finish and function — so a replacement head or cartridge is a genuine repair, not a throwaway.