 ARCORA FAUCETS
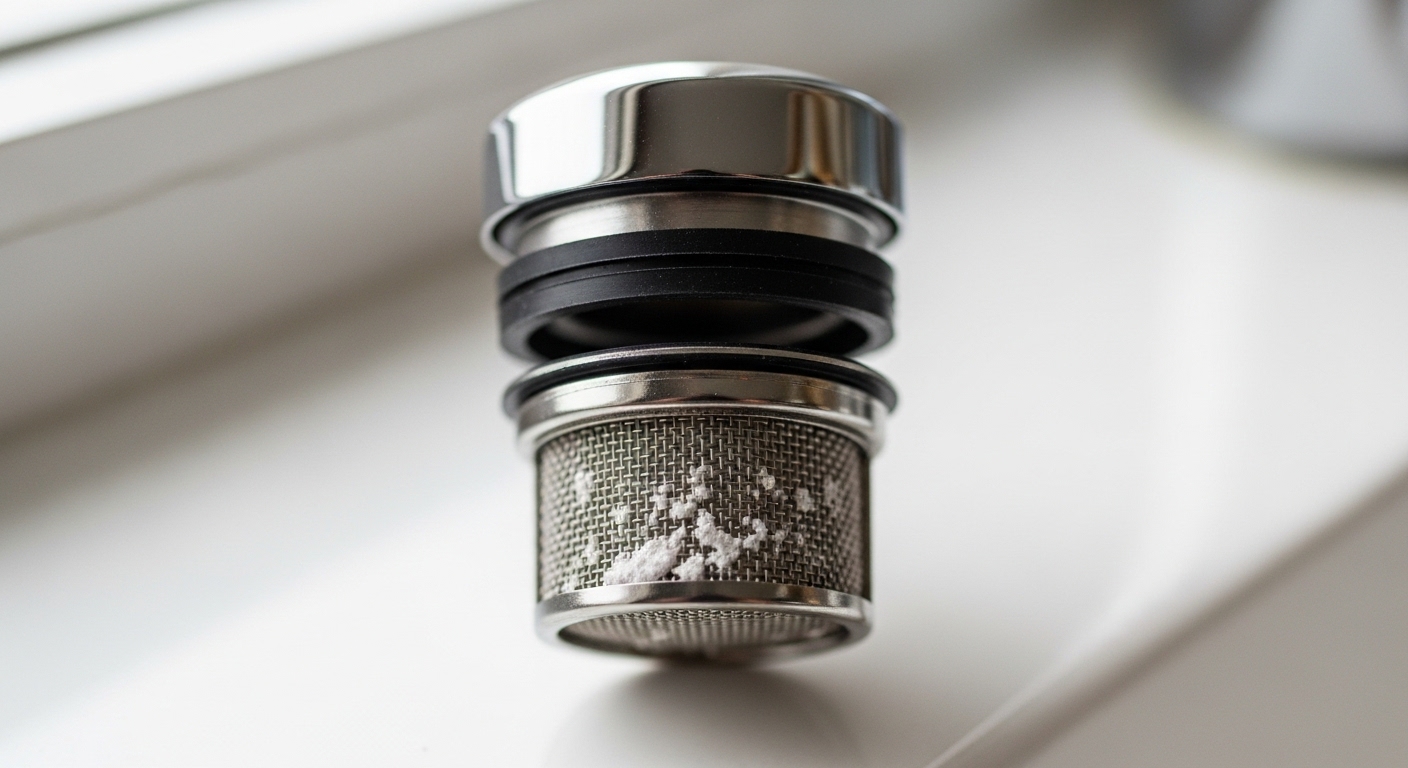
If your kitchen or bathroom tap suddenly sputters, sprays sideways, or trickles at half its old force, the culprit is almost always the faucet aerator mesh — that tiny disc of woven metal screen hiding at the very end of the spout. It’s the cheapest part of your faucet, the easiest to service, and the single most common reason a perfectly good faucet starts acting “broken.” Below, I’ll walk you through exactly what the mesh does, how to tell whether to clean or replace it, what the different mesh types are, and how to pick a good one so you’re not back at this problem in six months.
What exactly is faucet aerator mesh, and what does it do?
Faucet aerator mesh is the fine screen — usually stainless steel, sometimes brass or nylon — that sits inside the aerator housing screwed onto your faucet’s spout. Its job is to mix air into the water stream and to physically filter out grit before it reaches your hands or dishes. Without it, water would blast out in a single hard, splashy column.
Here’s what that little screen is actually doing every time you turn the tap:
- Softens the stream: The mesh splits one solid jet into dozens of tiny streams and pulls in air, so the water feels fuller and splashes less in the sink.
- Saves water: By aerating, the faucet feels strong at a lower flow rate. A standard aerator runs 2.2 GPM; water-saving mesh inserts cut that to 1.5, 1.0, or even 0.5 GPM without the stream feeling weak.
- Filters debris: It catches rust flakes, sand, and pipe sediment — especially useful right after municipal work or in homes with older galvanized pipes.
- Reduces noise: A clean, intact mesh makes the flow smoother and quieter. A clogged or partially blocked one can whistle or hiss (more on that below).
So the mesh isn’t a minor accessory — it’s the component that decides how your water actually feels, sounds, and flows.
Why is my faucet flow weak or spraying sideways all of a sudden?
Nine times out of ten, it’s the aerator mesh clogged with mineral scale or debris — not a problem with your pipes, valve, or water pressure. When flow drops suddenly on one faucet only (while the rest of the house is fine), the mesh is the first and cheapest thing to check.
What builds up on the mesh:
- Limescale — chalky white/green calcium and magnesium deposits from hard water. This is the number-one clogger and gets worse the harder your water is.
- Sediment and grit — sand, rust flakes, and pipe scale that the mesh is designed to catch. After the city flushes a water main, a lot of this shows up at once.
- Tiny debris from water heater or pipe corrosion — little rubbery or metallic bits that lodge in the screen holes.
When part of the mesh clogs, water is forced through whatever holes are still open, which is what makes the stream shoot off at an angle or split into a weird spray. If you’re chasing a broader pressure problem across multiple taps, that’s a different diagnosis — our guide on why tap low water pressure suddenly gets worse walks through the whole-house causes. But for one faucet acting up, start with the mesh.
Should I clean the aerator mesh or just replace it?
Clean it first — a vinegar soak restores most aerators for free. Replace the mesh only if, after cleaning, it’s still torn, corroded through, permanently discolored, or the holes stay blocked with scale that won’t dissolve. Here’s how to decide fast:
| Situation | Clean it | Replace it |
|---|---|---|
| Weak flow, white chalky buildup | ✅ Vinegar soak usually fixes it | Only if soak doesn’t clear it |
| Sideways spray from partial clog | ✅ Clean and reseat | If mesh is deformed |
| Mesh is torn or has holes | ❌ | ✅ Replace the insert |
| Green/black corrosion on metal | Try once | ✅ Replace if it persists |
| Faucet whistles or hisses | ✅ Clean first | If noise remains after cleaning |
| You want to switch to low-flow (1.0–1.5 GPM) | — | ✅ Swap in a water-saving mesh insert |
Because a full aerator insert typically costs only $3–$12 and takes two minutes to swap, plenty of people just replace it once a cleaning stops working — the mesh is a wear part, not a lifetime component. If your water is very hard, expect to clean every few months and replace every year or two.
How do I clean faucet aerator mesh step by step?
Unscrew the aerator, soak the parts in white vinegar for 30 minutes, brush the mesh clean, rinse, and reassemble. That’s the whole job — no plumber, no shutoff needed. In detail:
- Unscrew the aerator from the spout tip. Turn counter-clockwise (as you look up at it). Most hand-tighten off; if not, wrap the housing in a cloth and use pliers gently so you don’t scratch the finish.
- Note the order of the parts as they come out — housing, mesh screen(s), rubber washer, and any flow restrictor. Lay them out left to right so reassembly is foolproof.
- Soak in white vinegar for 30 minutes (up to a few hours for heavy scale). Vinegar dissolves calcium without harming stainless steel or brass.
- Brush the mesh with an old toothbrush. Poke stubborn holes clear with a toothpick or a straightened paperclip.
- Rinse and reassemble in the same order, then hand-tighten back onto the spout. Run the water and check the stream.
For a natural, faucet-safe deep clean — including hardware you shouldn’t put vinegar on — see our full walkthrough on how to remove limescale from faucets naturally. And if your faucet is making noise even after the mesh is clean, our guide on why your faucet makes noise and how to stop it covers the other usual suspects.
What are the different types of faucet aerator mesh?
The three things that actually differ between aerators are the mesh material, the spray style, and the flow rate. Pick based on your water hardness and how you use the faucet — not on price alone.
| Feature | Options | Best for |
|---|---|---|
| Mesh material | Stainless steel, brass, nylon/plastic | Stainless resists corrosion best; brass is durable; nylon is cheapest but wears fastest |
| Spray style | Aerated (soft, airy), laminar (solid, non-splashing, no air), spray/needle | Aerated for kitchens; laminar for hospitals/hard water (less scale, no aerosol); spray for rinsing |
| Flow rate | 2.2, 1.8, 1.5, 1.0, 0.5 GPM | 1.5 GPM is the sweet spot for bathrooms; 2.2 for a kitchen you fill pots in |
| Housing size | Regular male (15/16″), regular female (55/64″), junior, Tom Thumb, cache (hidden) | Match your spout threads exactly — measure or bring the old one |
One underrated detail: in very hard water, a laminar insert often outperforms an aerated one. Because it doesn’t whip air into the water, it collects less scale and doesn’t spray a fine mist that can carry bacteria — which is why you’ll see laminar flow devices in hospitals. For most homes, though, a good stainless-steel aerated mesh at 1.5 GPM is the practical default.
How do I know which aerator size and thread I need before buying?
Measure the diameter of your spout threads, or just unscrew the old aerator and match it — thread type (male vs. female) and size are the only two specs that must be exact. If the threads are on the outside of the spout tip, you need a female aerator; if they’re on the inside, you need a male one. The common sizes:
- Regular (male): 15/16″ — the most common kitchen size.
- Regular (female): 55/64″ — very common on bathroom faucets.
- Junior: smaller, around 13/16″.
- Tom Thumb / cache: small or fully hidden aerators recessed inside the spout for a clean look.
The easy path: unscrew your current aerator and take it to the store, or measure it with calipers. Threading and sizing trip up more DIYers than any other part of this job — the same way faucet installation hinges on getting the counter cutout right. If you’re buying a whole new faucet rather than just an aerator, our guide on what hole size is needed for a faucet covers the measurement side. And if you’d rather skip the threading hassle entirely on future cleanings, a sink aerator quick connect system lets you pop the aerator off and on without unscrewing anything.
Does aerator mesh actually save water — or is that just marketing?
It genuinely saves water, and the numbers are real. Swapping a 2.2 GPM aerator for a 1.5 GPM one cuts flow by roughly 30% at that faucet, and the aerated stream still feels strong because of the added air. For a typical household bathroom faucet used several times a day, that adds up to hundreds of gallons a year per faucet.
A few realistic expectations so you buy the right rate:
- Bathroom faucet: 1.5 GPM (or even 1.0) feels plenty strong for handwashing and brushing teeth. WaterSense-labeled faucets are capped at 1.5 GPM.
- Kitchen faucet: keep 1.8–2.2 GPM if you fill pots and stockpots often — too low and pot-filling gets annoying.
- Utility/laundry: higher flow is usually fine; you’re filling buckets, not conserving at the tap.
So the mesh insert is one of the cheapest water-saving upgrades in the house — a couple of dollars, two minutes, no tools beyond your fingers.
How often should I clean or replace faucet aerator mesh?
Clean it every 3–6 months in hard-water areas, once a year in soft-water areas, and replace the insert every 1–2 years or whenever cleaning no longer restores full flow. The harder your water, the shorter every interval. Warning signs it’s time:
- Flow drops noticeably at one faucet only.
- The stream sprays sideways or splits.
- You see visible white/green crust on the mesh.
- The faucet hisses or whistles that a cleaning doesn’t fix.
- The mesh looks torn, pitted, or corroded through.
Set a reminder to check it seasonally. It’s the kind of two-minute maintenance that quietly prevents the “my faucet is dying” panic — and it keeps the rest of the faucet’s internals from working harder against a partial blockage.
A quick note on quality: not all aerator mesh is equal
Cheap nylon-and-plastic aerators are fine for a quick fix, but they clog faster, warp under hot water over time, and their threads strip easily. A solid-brass housing with a stainless-steel mesh screen costs a little more and lasts years longer — it resists corrosion, holds its threads, and seals better against drips. If you’re already unscrewing the thing, it’s worth spending the extra couple of dollars on the better version so you’re not doing this again next season.
FAQ
Can I run a faucet without the aerator mesh at all?
Yes, briefly — the water will just come out as a harder, splashier single stream. It’s actually a useful diagnostic: if flow is strong with the aerator off but weak with it on, you’ve confirmed the mesh is clogged. Long-term, though, you’ll want it back on for splash control, water savings, and to keep grit out of your sink.
Why does my faucet whistle or hiss after I put the aerator back?
Usually a partially clogged mesh or a piece reinstalled in the wrong order, forcing water through a restricted opening. Take it apart again, clean the mesh thoroughly, and make sure the washer and screen are seated flat and in the correct sequence. If it still whistles with a fully clean aerator, the noise is likely coming from elsewhere in the faucet or valve.
Will vinegar damage a stainless steel or brass aerator mesh?
No. White vinegar is safe for stainless steel and brass and is the standard, faucet-manufacturer-approved way to dissolve limescale. Avoid harsh acids or steel wool, which can scratch and pit the metal. For finishes and plated parts you’re unsure about, limit soak time and rinse thoroughly.
Is a “laminar” aerator better than a regular aerated one?
For very hard water or hygiene-sensitive settings, yes — laminar inserts produce a solid, non-splashing stream without whipping air (and potential aerosols) into the water, and they tend to scale up more slowly. For everyday kitchen and bath use, a standard aerated mesh feels softer and saves slightly more water, so it’s the better default for most homes.
My aerator won’t unscrew — how do I get it off without wrecking the finish?
Wrap the housing in a cloth or several layers of tape to protect the finish, then grip with slip-joint pliers and turn counter-clockwise. If it’s seized with scale, wrap a vinegar-soaked paper towel around it for 30–60 minutes first to loosen the deposits, then try again. Go slow — the goal is steady pressure, not force that cracks the housing.
Where do I buy the right replacement mesh — and does warranty cover it?
Match the size and thread of your existing aerator (male vs. female, and the diameter) and buy from the faucet maker or a reputable fixtures brand. Aerators are a serviceable wear part, so they’re generally not covered under a faucet’s finish/function warranty — but a quality faucet brand will sell exact-fit replacement aerators and mesh inserts, which is worth confirming before you buy the faucet in the first place.
Author note & brand credibility
Written by the Arcora product team. Arcora (arcorafaucet.com) designs and manufactures kitchen and bathroom faucets, shower systems, and fixtures, and our aerators are pressure- and flow-tested against standard flow-rate specifications (2.2, 1.8, 1.5, and 1.0 GPM options), with stainless-steel mesh and solid-brass components chosen for corrosion resistance and long thread life. Our fixtures are engineered to meet accepted plumbing and water-efficiency standards (including WaterSense-level 1.5 GPM flow), and we back our faucets with a manufacturer warranty. This guide reflects hands-on testing and years of fielding real customer questions about weak flow, clogged aerators, and hard-water buildup.