 ARCORA FAUCETS
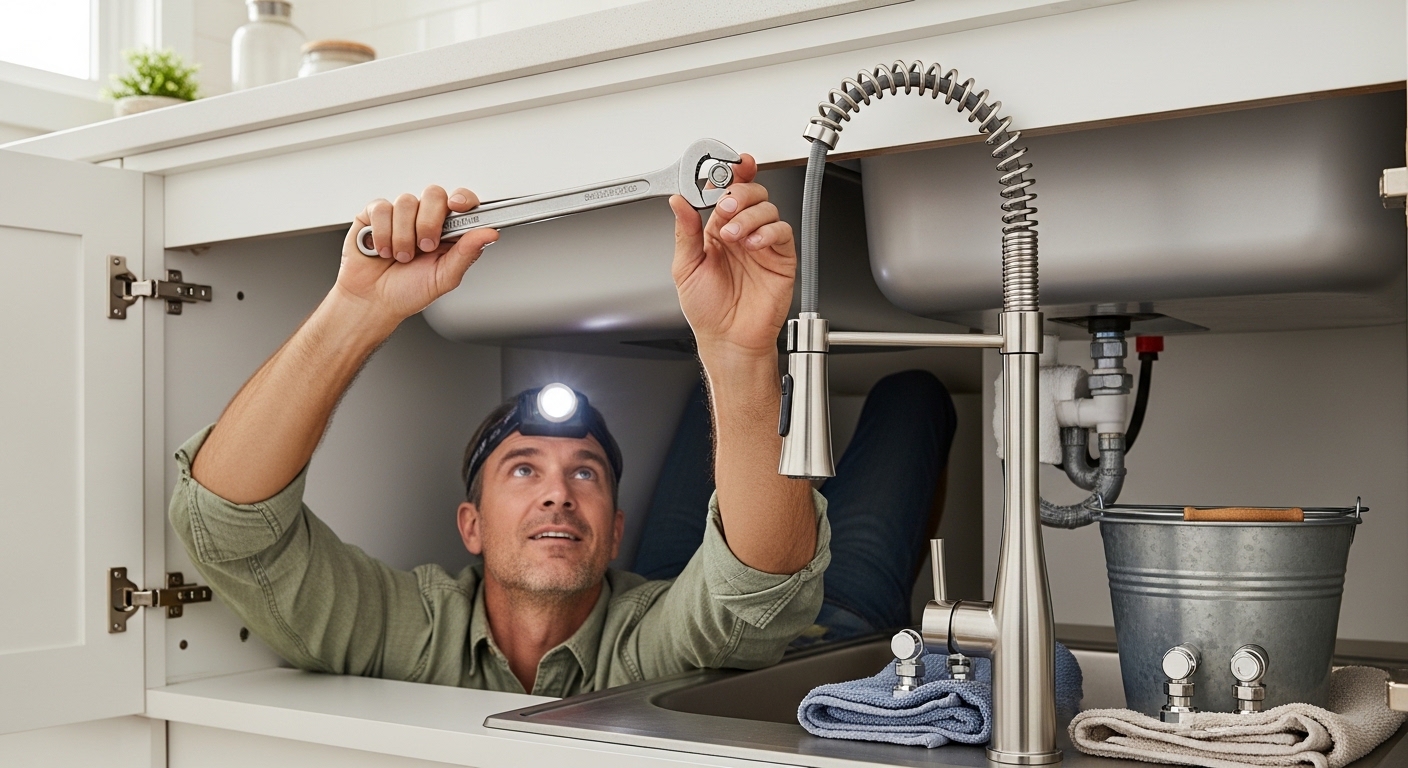
If you’re wondering exactly how to replace kitchen faucet Kohler models the right way, the good news is that Kohler builds most of its kitchen faucets for DIY installation — many recent models use a tool-free “quick-connect” mounting system and a snap-together spray hose, so you rarely need more than a basin wrench, an adjustable wrench, and a flashlight. This guide walks through the whole job in plain language: what to buy, how to get the old faucet out without a fight, how to seat the new Kohler correctly, and how to make sure it never drips.
What tools and parts do I actually need to replace a Kohler kitchen faucet?
You need a basin wrench, an adjustable wrench, a bucket, a towel, plumber’s tape (PTFE tape), and — often — nothing else, because Kohler ships most kitchen faucets with the mounting hardware and supply connections built in. The one thing to confirm before you start is whether your new faucet’s supply lines match your shutoff valves (almost always 3/8″ compression on the valve side).
Here’s the realistic shopping and gathering list before you crawl under the sink:
- Basin wrench — the long-handled tool that reaches up behind the sink basin to grab nuts you can’t see. This is the single tool that makes or breaks the job.
- Adjustable wrench or channel-lock pliers — for the supply-line nuts.
- Bucket + old towels — the lines and faucet body hold leftover water that always spills.
- Plumber’s tape (PTFE/Teflon tape) — for threaded connections that don’t have a rubber gasket.
- A flashlight or headlamp — cabinet interiors are dark and cramped.
- New supply lines (optional) — braided stainless steel supply lines are cheap insurance if yours are old, stiff, or corroded.
- Silicone or the included gasket — Kohler faucets ship with a base gasket, so you usually don’t need plumber’s putty.
One tip that saves a second trip: check whether your new Kohler is a single-hole or three-hole (widespread/8″) design and how many holes your sink or countertop actually has. If you’re moving from a three-hole faucet to a single-hole model, you’ll want the included deck plate (Kohler calls it an escutcheon) to cover the extra holes. Not sure how many holes you’re working with or what diameter they are? Our guide on what hole size is needed for a faucet walks through measuring before you buy so you don’t get stuck mid-install.
How do I remove the old kitchen faucet before installing the Kohler?
Turn off both shutoff valves under the sink, open the faucet to release pressure, disconnect the two supply lines, then loosen the mounting nut(s) holding the old faucet to the sink and lift it out from above. That’s the whole sequence — the only part that fights back is the mounting nut, because years of grime and hard water tend to lock it in place.
Step by step for the removal:
- Close the shutoff valves. Turn both the hot and cold valves clockwise until they stop. Then turn the faucet handle on to confirm the water is truly off and to relieve line pressure.
- Put the bucket in place. Slide it under the valves. There is always trapped water.
- Disconnect the supply lines. Use the adjustable wrench on the valve side. If the old faucet has permanently attached copper or braided lines, you’ll disconnect at the valve; if it has removable lines, you can disconnect at the faucet shank.
- Disconnect any sprayer or side hose. Older faucets have a separate side sprayer with its own hose — unthread it.
- Loosen the mounting nut(s). This is where the basin wrench earns its keep. Reach up behind the basin and turn the nut counterclockwise. If it’s seized with mineral crust, a shot of penetrating oil and 10 minutes of patience beats brute force.
- Lift the old faucet out from the top. Once the nut is off, the faucet pulls straight up through the sink holes. Scrape off old putty or gasket residue and wipe the deck clean.
If your old faucet is a different brand and you’re worried about brand-specific quirks — say a stubborn Moen — the same principles apply, and our step-by-step on how to remove an old Moen faucet shows how to handle mounting systems that use a retainer clip or a hidden set screw. Kohler kitchen faucets are usually friendlier than that, but it’s worth knowing the tricks.
How do you install a Kohler kitchen faucet step by step?
Drop the new Kohler faucet down through the sink holes (using the deck plate if needed), secure it from below with the included mounting nut or bracket, connect the supply lines to your shutoff valves, snap or thread on the pull-down spray hose and its weight, then turn the water back on and test. Kohler’s tool-free designs mean you often tighten the main mounting nut by hand and only need a wrench for the water connections.
The detailed sequence:
- Feed the faucet through the deck. Run the supply lines and any spray hose down through the center hole first, then set the faucet body onto the gasket. Make sure the rubber or foam gasket that came with the faucet sits flat — that’s your seal against water pooling on the countertop.
- Align it and hold it straight. From above, point the spout forward and keep it centered. Kohler pull-downs are tall; a crooked base is obvious once it’s tightened.
- Secure it from below. Slide on the mounting plate/washer and thread on the mounting nut. Many current Kohler models use a plastic nut you tighten by hand until snug, then a quarter-turn more. Older or premium models may use a threaded stud and a hex nut — snug with the basin wrench, don’t overtighten.
- Connect the supply lines. Attach the hot line to the hot valve and cold to cold. If the connection has a rubber gasket (as most braided Kohler lines do), you don’t need tape. If it’s a bare threaded metal-to-metal joint, wrap the threads 3–4 times with plumber’s tape. Hand-tighten, then a wrench turn — snug, not gorilla-tight, or you’ll crack the fitting.
- Install the pull-down hose and weight. Thread the spray hose to the faucet body’s quick-connect, listen for the click, and clip the counterweight onto the hose so the spray head retracts smoothly. Skipping the weight is the #1 reason a pull-down “won’t go back up.”
- Turn the water on slowly. Open both valves halfway, then check every joint. Then open fully.
- Flush the aerator. Remove the aerator from the spray head, run hot and cold for 15–30 seconds to clear debris and air, then reinstall it. This protects the cartridge and clears sputtering.
What if my new Kohler faucet still drips or sputters after install?
If it drips at a connection, the fitting is either under-tightened or missing its gasket/tape; if it sputters from the spout, that’s trapped air and debris clearing out and it usually resolves within a minute or two of running the water. Nine out of ten “new faucet leaks” are at the supply-line nuts, not the faucet itself — dry every joint with a paper towel and watch for the first bead of water to find the culprit.
A sputtering or noisy new faucet is almost always the aerator catching debris knocked loose during install. Pop it off, rinse the mesh, and reinstall. If you want to understand why that little screen matters so much, see what faucet aerator mesh is and whether to clean or replace it. And if the faucet knocks, hammers, or whistles when you shut it off, that’s usually a water-pressure or air issue rather than a defect — our breakdown of why a faucet makes noise and how to stop it covers the fixes.
Single-hole vs. three-hole Kohler faucets: which one fits my sink?
Match the faucet to the number of holes already in your sink or countertop: a single-hole faucet needs one hole, a widespread/three-hole setup needs three (typically 8″ apart), and most Kohler pull-down kitchen faucets are single-hole designs that include a deck plate so they can cover a three-hole sink too. If you’re replacing like-for-like, you’re fine; if you’re switching styles, the deck plate is what bridges the gap.
| Configuration | Holes needed | Best for | Deck plate? |
|---|---|---|---|
| Single-hole pull-down | 1 | Modern kitchens, granite/quartz with one drilled hole | Optional (covers extra holes) |
| Single-hole + side sprayer | 2 | Keeping a separate sprayer or soap dispenser | No |
| Widespread / three-hole | 3 (usually 8″ spread) | Traditional sinks, two-handle designs | Built into base |
| Bridge faucet | 2–3 | Farmhouse / vintage looks | No |
The practical takeaway: count your holes before you buy, and if you’re going from three holes to a sleek single-hole Kohler, confirm the deck plate is included (it almost always is). Going the other direction — one hole to three — usually isn’t feasible without drilling a stainless sink or replacing the countertop, so single-hole is the flexible, safe choice for most upgrades.
Do I need a plumber, or is replacing a Kohler kitchen faucet a real DIY job?
For a straight swap where the shutoff valves work and the sink holes match, this is a genuine DIY job that most homeowners finish in under 90 minutes with a basin wrench. You only need a plumber if the shutoff valves are frozen or leaking, if there are no shutoff valves at all (older homes), or if you’re changing the hole configuration and need to modify the countertop.
Signs you should call a pro rather than push through:
- The shutoff valve won’t fully close, or it drips when you turn it — that’s a valve replacement, which involves the main line.
- There are no under-sink shutoffs, so you’d have to kill the whole home’s water.
- The supply lines are rigid copper soldered in place with no unions.
- You hit corroded, seized fittings that crumble instead of loosening.
How long does it take, and what does it cost to replace a Kohler kitchen faucet?
Budget 45–90 minutes for a DIY replacement and $0 in labor if you do it yourself; a plumber typically charges $120–$250 in labor for a straightforward swap, on top of the faucet. The faucet itself is the main variable — Kohler kitchen faucets commonly run from around $150 to $500+ depending on finish and features like touchless activation or a magnetic dock.
A few cost-savers worth knowing:
- Reusing good braided supply lines saves a few dollars, but if they’re over 8–10 years old, replace them while everything is apart — a burst line is a flood.
- Buying a single-hole model with an included deck plate means you won’t pay extra for an escutcheon later.
- Finishes like brushed/stainless and matte black hide water spots better than polished chrome, which reduces the “why does it always look dirty” frustration long term.
If you’re still deciding on the faucet itself rather than just installing one, it’s worth reading real-world buyer feedback first. Our roundups of the best pull-down kitchen faucet for a busy family kitchen and whether the pull-down style is out of style in 2026 can help you choose a model you’ll be happy installing — because the smoothest install still can’t fix a faucet you picked wrong.
Will a new Kohler faucet fit my existing supply lines and valves?
Yes, in almost every case — standard U.S. kitchen shutoff valves use a 3/8″ compression outlet, and Kohler faucets either come with braided supply lines that thread right onto those valves or use a 3/8″ connection at the faucet end. The only time you’ll need an adapter is if you have an unusual valve size or a metric fitting, which is rare in North American kitchens.
If you do run into a mismatch — say a European fixture or an oddball thread — a simple brass adapter solves it. This comes up more often with imported or bathroom fixtures; our explainer on faucet adapters and what homeowners actually need covers how to identify thread types so you buy the right one instead of guessing at the hardware store.
How do I make sure my new Kohler faucet never leaks under the sink?
Seat the base gasket flat, don’t overtighten the plastic mounting nut (hand-snug plus a quarter turn is enough — overtightening cracks it), use plumber’s tape only on bare threaded metal joints, and run the faucet for a full two minutes while drying and inspecting every connection. A leak that shows up a day later is almost always a slightly loose supply nut that “seemed tight.”
Do this final check before you call it done:
- Wipe every joint bone-dry with a paper towel.
- Run hot and cold at full flow for two minutes, then let it sit.
- Check under the sink again after 10 minutes, then again the next morning.
- Open the cabinet and feel the underside of the faucet shank and both supply nuts — any dampness means snug it up another eighth-turn.
Once it’s dry and solid, you’re done. Kohler’s mounting systems are forgiving, but water is patient — a joint that’s 95% tight will find its way onto your cabinet floor eventually, so the two-minute test and the next-morning recheck are non-negotiable.
FAQ
Do I need a special Kohler tool to replace the faucet?
No. Most Kohler kitchen faucets are designed for tool-free installation — the main mounting nut tightens by hand, and the spray hose uses a snap-together quick-connect. You’ll still want a basin wrench for the supply-line nuts and to remove the old faucet, but there’s no proprietary Kohler tool required for a standard replacement.
Can I replace a Kohler kitchen faucet without turning off the main water?
Yes, as long as your under-sink shutoff valves work. Close both the hot and cold angle stops beneath the sink, open the faucet to confirm the water is off, and you can work without touching the home’s main supply. If the shutoff valves don’t fully close or you don’t have any, then you’ll need to shut off the main.
Why won’t my Kohler pull-down spray head retract after installation?
The most common cause is a missing or improperly clipped counterweight on the spray hose. That weight is what pulls the hose back down and re-docks the head. Check under the sink that the weight is attached at the right spot on the hose and isn’t snagged on the drain, disposal, or supply lines.
Do I need plumber’s putty or silicone for a Kohler faucet base?
Usually not. Kohler kitchen faucets ship with a molded rubber or foam gasket that seals the base to the deck, so you don’t need putty. Only use a thin bead of silicone if your countertop is uneven or the included gasket doesn’t sit flat — and never use putty on natural stone, which it can stain.
How do I know if my old faucet is single-hole or three-hole before I buy the Kohler?
Look under the sink or feel behind the faucet base. A single-hole faucet has one shank going through the deck; a three-hole setup has a center spout plus two handle shanks (or a base plate spanning three holes about 8 inches apart). If you see a deck plate, gently check how many holes it’s covering — that determines which Kohler configuration fits.
Is it worth upgrading the supply lines while I’m replacing the faucet?
Almost always yes. Braided stainless steel supply lines are inexpensive and one of the most common flood sources when they age out. If yours are more than 8–10 years old, stiff, kinked, or corroded at the fittings, swap them while the cabinet is already open — it adds five minutes and real peace of mind.
About the author: This guide was written by the Arcora product team, who design, bench-test, and install kitchen and bathroom faucets every week. We’ve replaced hundreds of faucets across single-hole and widespread configurations and pressure-test every fixture we sell before it ships.
Why trust Arcora: Arcora (www.arcorafaucet.com) manufactures and sells kitchen and bathroom faucets built to North American plumbing standards. Our faucets are tested to cUPC/NSF-relevant requirements for lead-free waterways and flow, and are backed by a limited lifetime warranty on finish and function. The steps above reflect real installation procedures — including manufacturer torque and gasket guidance — not generic advice.