 ARCORA FAUCETS
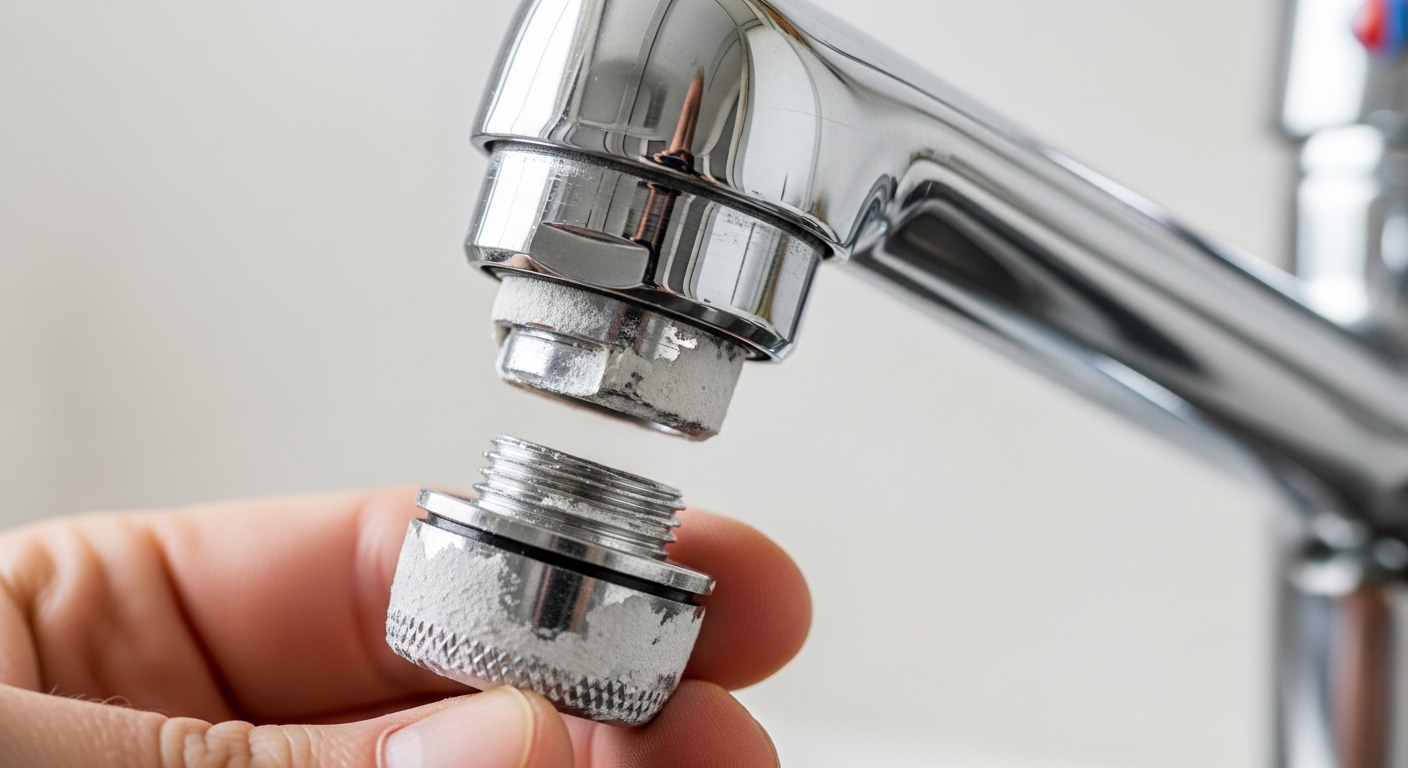
Faucet aerator removal sounds trivial until you’re standing at the sink, fingers slipping, and the little screen won’t budge. The good news: 95% of the time you don’t need a plumber, special tools, or a replacement faucet. You need the right direction, the right grip, and a way to break the mineral “glue” that hard water leaves behind. This guide walks through exactly how to unscrew any aerator — standard, hidden (cache/recessed), or dual-thread — plus how to free a stuck one without cracking the housing or scarring your finish.
An aerator is the small screw-on tip at the mouth of nearly every kitchen and bathroom faucet. It mixes air into the water to reduce splashing, save water, and give you that soft, even stream. Because water passes through it constantly, it’s also the first place sediment, rust flakes, and calcium collect — which is why removing it is one of the most common DIY faucet fixes.
Which Way Do You Turn a Faucet Aerator to Remove It?
Turn it counterclockwise (to the left) when viewed from below, looking up at the faucet tip. Aerators use standard right-hand threads, so “lefty-loosey” applies. The catch that trips people up: you’re looking up at the underside of the spout, so “left” from your point of view can feel backwards. Position yourself directly under the spout, imagine a clock face on the aerator, and rotate the top of it toward the 9 o’clock position.
Most aerators are only finger-tight, so if the faucet is newer or your water is soft, it may spin off with bare hands. If it resists, that resistance is almost always mineral scale, not overtightening — which is the real reason so many people think their aerator is “welded on.”
- Standard aerator: visible knurled ring at the very tip; unthreads directly.
- Cache (recessed / hidden) aerator: sits flush inside the spout with no visible ring; needs a small key tool.
- Dual-thread aerator: has both male and female threads so it fits multiple faucets; removed the same counterclockwise way.
How Do You Remove a Faucet Aerator Without a Tool or Without Scratching It?
Wrap a rubber band, a wide rubber jar-gripper, or a thick cloth around the aerator for grip, then twist by hand — no metal tool touches the finish. A rubber band gives your fingers surprising traction on a wet, rounded housing, and it leaves zero marks. This is the method to try first on any polished chrome, brushed nickel, matte black, or brushed gold faucet, because those finishes scratch the moment bare pliers slip.
If bare hands and rubber still won’t move it, step up to padded tools in this order:
- Rubber band or silicone jar opener — best grip-to-risk ratio, no marks.
- Cloth-wrapped slip-joint pliers or tongue-and-groove pliers — wrap a microfiber or duct-tape a strip over the jaws, grip gently, twist counterclockwise.
- Strap wrench — a rubber-strap wrench distributes force around the whole housing and is the safest metal tool for delicate finishes.
Whatever you use, apply steady pressure, not a sudden yank. A hard jerk is what strips the plastic threads on inexpensive aerators or cracks a brittle housing. And before you start, put a rag or a small cup in the sink drain — the aerator body and its tiny washer/screen love to disappear down the plughole.
How Do You Remove a Faucet Aerator That’s Stuck From Hard Water Buildup?
Soak it in white vinegar to dissolve the mineral scale, then it will turn freely. Calcium and lime deposits are what “cement” a stuck aerator in place, and household white vinegar (acetic acid) breaks them down chemically so you don’t have to force anything. This single trick solves the vast majority of “my aerator won’t come off” situations.
Here’s the reliable method:
- Fold a paper towel into a strip and soak it in undiluted white vinegar.
- Wrap it snugly around the aerator (and up onto the spout threads if you can), then cover with a small plastic bag or plastic wrap to keep it wet.
- Wait 20–30 minutes for light buildup, or up to a few hours (or overnight, bag rubber-banded in place) for heavy corrosion.
- Remove the wrap, add fresh grip (rubber band or padded pliers), and twist counterclockwise. It should give way with far less force.
Two more moves for a truly seized aerator: gently tap around the housing with the plastic handle of a screwdriver to crack the mineral bond, and apply a tiny amount of penetrating lubricant to the threads if it’s a metal-on-metal joint (avoid oils on plastic threads). Heat from a hair dryer on the metal spout can also help metal parts expand and release — never use an open flame near a faucet.
If you’re fighting scale on the aerator, you’re almost certainly fighting it elsewhere too. Our guide on how to remove hard water stains on a faucet without wrecking the finish covers the same vinegar chemistry for the visible parts of your fixture.
How Do You Remove a Hidden (Cache) Faucet Aerator With No Visible Ring?
A hidden aerator is removed with a small plastic aerator key that slots into notches inside the spout tip, then turns counterclockwise. Many modern faucets — Moen, Delta, Kohler, and premium brands like Arcora — use these recessed “cache” aerators for a cleaner look, and they usually ship with the matching key. If you’ve lost yours, universal aerator key sets are a few dollars at any hardware store, and they’re keyed by cavity size (M18.5, M21.5, M24, etc.).
To use it: push the key straight up into the aerator so its teeth engage the internal slots, hold it flush, and rotate counterclockwise. Because there’s nothing to grip on the outside, forcing a hidden aerator with pliers usually just chews up the spout — the key is the correct tool. If it’s stuck, the same vinegar soak works: press a vinegar-soaked cotton ball into the spout tip and bag it before you try the key again.
| Aerator Type | How to Identify It | Removal Method | Typical Difficulty |
|---|---|---|---|
| Standard (male/female thread) | Visible knurled ring at the spout tip | Hand + rubber band, or padded pliers, counterclockwise | Easy |
| Cache / hidden (recessed) | Smooth tip, no visible ring | Insert plastic aerator key, turn counterclockwise | Easy–Moderate |
| Dual-thread | Threads on both inside and outside of the housing | Same as standard; note which thread engaged | Easy |
| Stuck / heavily scaled (any type) | Won’t move, crusty white/green deposits | Vinegar soak 20 min–overnight, then twist | Moderate |
What Should You Do Once the Aerator Is Off — Clean It or Replace It?
Clean it first; replace it only if the screen is torn, the housing is cracked, or the threads are stripped. Disassembling and rinsing an aerator takes five minutes and restores flow for pennies, whereas a new aerator costs a few dollars. Once it’s off, lay the parts out in the order they came apart — usually a housing, a rubber washer/O-ring, a plastic flow restrictor, and one or more metal or nylon screens.
- Rinse each part under running water to flush loose grit and rust flakes.
- Soak the screen and housing in white vinegar for 20–60 minutes to dissolve stubborn scale.
- Scrub the mesh gently with an old toothbrush; poke clogged holes with a toothpick or a pin.
- Rinse thoroughly so no vinegar or debris remains.
- Reassemble in the exact reverse order and hand-tighten — don’t over-torque, or you’ll crush the washer and cause a leak.
Reassembly order matters more than people expect, especially the screen orientation and washer seating. If you’re unsure whether your mesh is salvageable or done, we break down the difference in what faucet aerator mesh is and whether to clean it or replace it. And if, after all this, your flow is still weak, the aerator may not be the culprit at all — a similar clog can hit shower fixtures, which is why our guide on how to fix low pressure in a shower head fast uses the same diagnostic logic.
How Often Should You Remove and Clean a Faucet Aerator?
Clean it every 3–6 months in hard-water areas and once a year in soft-water areas. If you notice a suddenly weak, sputtering, or oddly angled stream, that’s your signal to remove and clean it regardless of the calendar — those symptoms are classic aerator clogs. Removing it periodically also lets you catch a degrading rubber washer before it fails and starts dripping.
A few quick signs it’s time for aerator removal and a cleanout:
- Water pressure at that one faucet has dropped while others are fine.
- The stream sprays sideways or splits into separate jets.
- You see white crust or reddish-brown rust flecks at the spout tip.
- The faucet sputters or spits air after being off for a while.
Do All Faucets Have Removable Aerators — and What If Mine Doesn’t?
Most standard kitchen and bathroom faucets have removable aerators, but some pull-down sprayers, touchless faucets, and low-flow “laminar” models integrate the aerator into a snap-fit spray head instead of a threaded tip. If you don’t see a ring and a key won’t engage, check whether your spout tip is a pull-off spray face (common on pull-down kitchen faucets) rather than a threaded aerator. In that case, the flow component pops out with a tab or twist-lock, and you clean it the same way.
When you do need a replacement, match three things: thread type (male vs. female), thread size (the common sizes are the regular male 15/16″-27 and female 55/64″-27), and flow rate in gallons per minute (GPM). Bathroom faucets are typically capped at 1.2 GPM and kitchen faucets at 1.5–1.8 GPM under WaterSense and California/EPA standards, so buying a matching or lower GPM keeps you code-compliant. If you’re rethinking flow overall, our explainer on what counts as a low-flow kitchen faucet helps you pick the right GPM before you buy.
A Quick Word on Doing This Right (E-E-A-T)
Author note: This guide was written by the Arcora product team and reviewed against real installation and service experience across chrome, brushed nickel, matte black, and brushed gold faucets. We remove and reinstall aerators constantly during quality testing, so the “protect the finish first, break the scale second” sequence here reflects what actually works on the bench — not just theory.
Brand credibility: Arcora designs and manufactures kitchen and bathroom faucets, shower systems, and fixtures built to North American plumbing standards. Our faucets are tested to meet cUPC certification and lead-free requirements (NSF/ANSI 372), ship with WaterSense-compliant aerators where applicable, and are backed by a manufacturer’s warranty on the finish and cartridge. That means the aerator threads on an Arcora faucet are dimensioned to standard sizes, so replacement aerators from any reputable maker will fit — you’re never locked into a proprietary part.
FAQ
Which way do I unscrew a faucet aerator?
Counterclockwise (lefty-loosey) when you’re looking up at the underside of the spout. Standard right-hand threads mean turning it to the left loosens it. If it won’t move, it’s mineral buildup, not the direction — soak it in vinegar first.
How do I remove a faucet aerator without scratching a matte black or brushed gold finish?
Use a rubber band or a silicone jar-opener pad for grip and twist by hand — no metal touches the finish. If you must use pliers, wrap the jaws in a microfiber cloth or duct tape, or use a rubber strap wrench, which spreads the force and won’t mar the coating.
My aerator is completely stuck and won’t budge — what now?
Wrap it in a vinegar-soaked paper towel, bag it to keep it wet, and wait 30 minutes to overnight to dissolve the scale. Then tap the housing gently to crack the mineral bond, add fresh grip, and twist counterclockwise. For metal-on-metal joints, a little penetrating lubricant or gentle heat from a hair dryer helps.
How do I remove a hidden aerator with no visible ring?
That’s a recessed “cache” aerator, and it needs a small plastic aerator key that slots into notches inside the spout tip. Push the key up until the teeth engage, then turn counterclockwise. Universal key sets cost a few dollars if you’ve lost the one that came with your faucet.
Can I run my faucet without the aerator installed?
Yes, temporarily — the faucet works fine, but you’ll get a harsher, splashier stream and higher water use. Running it aerator-off for a minute is actually a good diagnostic and flushing step: if pressure returns to normal, the aerator was your clog. Just reinstall it afterward to keep the smooth, water-saving stream.
Should I replace the whole aerator or just clean it?
Clean it first — a vinegar soak and toothbrush scrub restore most aerators for free. Replace it only if the mesh screen is torn, the housing is cracked, or the threads are stripped. When replacing, match the thread type, thread size, and GPM flow rate of the original.