 ARCORA FAUCETS
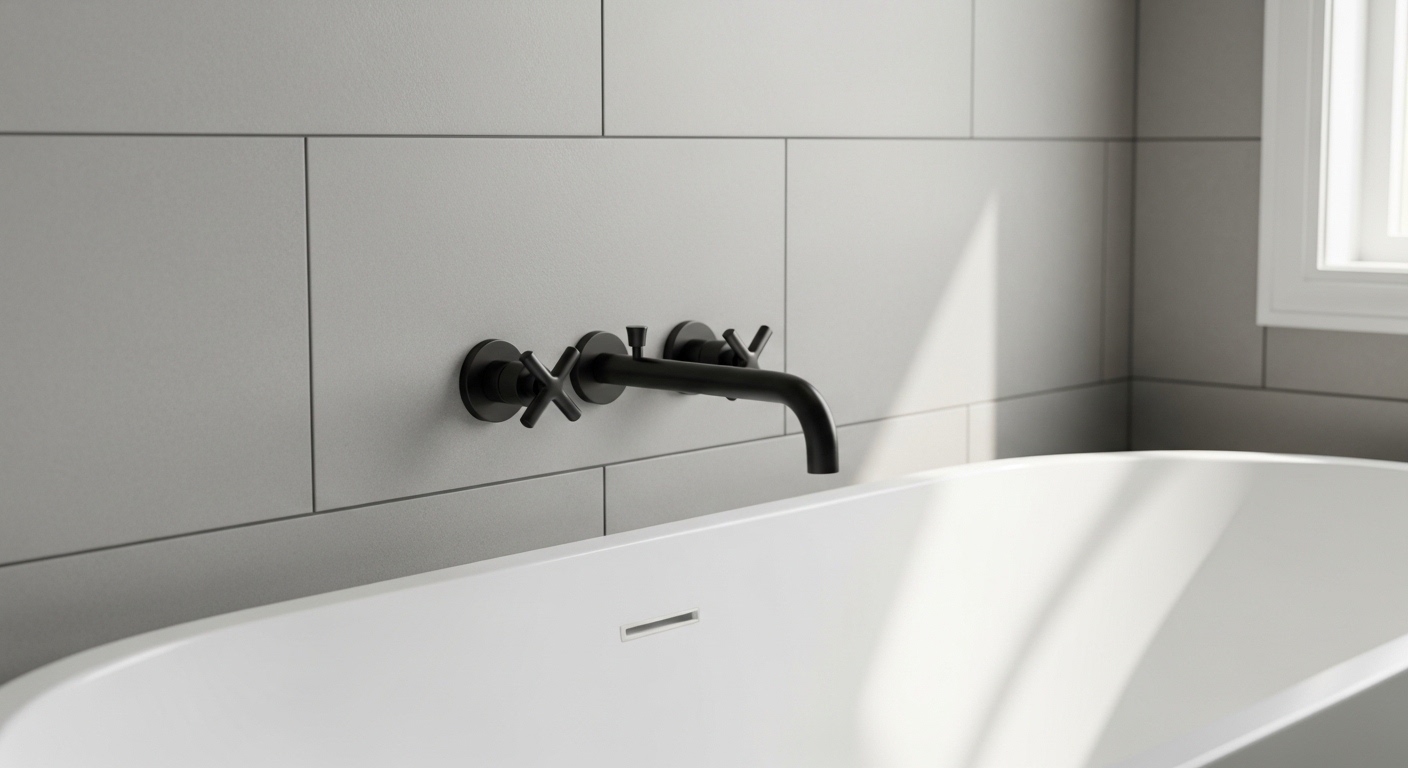
Choosing a wall mount faucet for bathtub installs comes down to one honest question: where does your water actually come from, and how much wall are you willing to open up? A wall-mounted tub filler mounts the spout and handles directly onto the wall above the tub instead of on the tub’s deck or the floor. It looks architectural and keeps the tub rim clear, but it’s a “decide before you tile” fixture — the rough-in has to be right the first time. Below, we’ll walk through when it’s the right call, exact heights and clearances, how it compares to deck-mount and freestanding fillers, and how to buy one that won’t drip in two years.
I’ve specified and installed tub fillers for both remodels and new builds, and the wall mount is the one that rewards planning and punishes guessing more than any other tub faucet style. Let’s get you the answer for your specific bathroom.
What is a wall mount faucet for a bathtub, and how is it different from a deck-mount?
A wall mount tub faucet is a filler where the spout and handles come out of the wall above the tub, fed by plumbing hidden inside the wall — nothing sits on the tub itself. A deck-mount faucet, by contrast, is drilled into the tub’s flat rim (the “deck”) or a tile ledge and fed from below.
That single difference — wall versus deck — drives everything else: cost, look, valve type, and how repairable it is later. With a wall mount, all the working parts (the valve body, the diverter if you have a hand shower) live behind the tile, accessed through the trim plate or an access panel. With a deck mount, the valve sits under the tub deck.
Here’s the practical breakdown of who each type suits:
- Wall mount: best for freestanding tubs pushed against a wall, alcove tubs, or any layout where you want the tub rim completely clear and easy to wipe down.
- Deck mount: best for tubs with a wide flat rim (4″+ of flat deck) or a tiled surround ledge, where you don’t want to open the wall.
- Floor mount (freestanding filler): best for a tub sitting in the middle of the room, away from any wall.
If you’re weighing the freestanding route instead, it’s worth reading what a freestanding tub faucet valve actually does before you commit — the valve choice is different and it changes your plumbing plan.
When should you choose a wall mount tub faucet instead of a deck-mount?
Choose a wall mount faucet for your bathtub when your supply lines already run through the wall behind the tub, when your tub has little or no flat deck to drill into, or when you’re mid-remodel with the wall open anyway. In those three situations, wall mount is usually cheaper in labor and cleaner in looks than forcing a deck mount.
Go deck-mount or floor-mount instead when the wall is finished and you don’t want to demo tile, or when the tub sits away from the wall.
A few real scenarios I get asked about constantly:
- “I have a freestanding tub 4 inches off the wall.” Wall mount is ideal — a long spout reaches over the rim and the tub stays sculptural. Just confirm the spout reach clears the tub wall by at least an inch.
- “My alcove tub’s faucet is on the wall already.” You likely have a wall setup by default; a wall mount tub filler (or a tub-and-shower valve) is the natural replacement.
- “My tub has a wide tiled deck.” Deck-mount is simpler here — no wall demo, and the ledge is built for it.
Budget matters too. A decent wall mount tub filler runs roughly $150–$450 for the trim and valve; the bigger variable is labor and tile work if the wall isn’t already open. Opening a finished, tiled wall to add a wall mount can add several hundred dollars in tile repair alone — which is exactly why the “wall is already open” scenario is where wall mount shines.
What height should a wall mount tub faucet be installed at?
Install the spout so it sits about 4 to 6 inches above the tub’s flood rim (the overflow level), with the handles roughly centered on the spout or just to the sides. For most standard tubs, that puts the spout outlet around 24 to 33 inches off the finished floor — but always measure from your tub, not a generic number.
The reason the flood-rim reference matters more than a floor measurement: plumbing code requires an air gap so dirty tub water can never siphon back into your supply. The spout outlet must stay above the tub’s highest possible water level. Get this wrong and you fail inspection.
Here are the numbers I plan around:
| Measurement | Typical target | Why it matters |
|---|---|---|
| Spout above flood rim | 4″–6″ | Air-gap / anti-siphon, avoids splashing |
| Spout reach over tub wall | 2″–6″ past inner tub edge | Water lands in the tub, not on the rim |
| Handle center height | Level with or just below spout | Comfortable reach from outside the tub |
| Handle spread (widespread trim) | Match the valve rough-in exactly | Trim won’t cover mis-set valves |
| Valve depth in wall | Per the valve’s plaster guard | Trim seats flush against finished tile |
Because a wall mount lives inside the wall, getting the rough-in dimensions right before you close it up is non-negotiable. If you’re roughing in from scratch, cross-check your numbers against these tub shower valve rough-in dimensions so the trim plate lands flush and the handles line up.
How do you install a wall mount faucet for a bathtub yourself?
You can install a wall mount tub faucet yourself if the wall is open (new construction or a gut remodel) and you’re comfortable with copper, PEX, or press fittings — plan a full day. If the wall is finished and tiled, this is a job where opening the wall correctly is most of the work, and many people bring in a plumber for the rough-in and DIY the trim.
The sequence, at a high level:
- Set the valve body in the open wall at your planned height, secured to blocking (2×4 nailers) so it can’t shift. Use the plaster guard to set correct depth for your finished tile thickness.
- Run and connect supply lines — hot on the left, cold on the right by convention — and the spout drop.
- Pressure-test before you close the wall. Cap it, turn on the water, and check every joint. This is the step people skip and regret.
- Close and tile the wall, leaving the plaster guard proud until tile is done.
- Install the trim: handles, escutcheons, and spout, sealing the spout base against the finished wall with plumber’s putty or silicone per the maker’s instructions.
If you’re not building a wall from scratch but just swapping the fixture on an existing tub, the process is closer to a standard faucet swap — this walkthrough on how to change a bathroom faucet on a tub covers the trim-level work well.
One warning worth stating plainly: because the valve is buried, a leak inside the wall is the worst-case scenario for this style. That’s why the pressure test and quality valve body matter far more here than on a deck faucet you can reach under the sink.
Wall mount vs deck mount vs freestanding tub filler: which is best for your setup?
For a tub against a wall, wall mount wins on looks and rim clearance. For a tub with a wide deck and a finished wall, deck mount wins on install cost. For a tub in the open, floor-mounted freestanding filler is the only option. There’s no universal “best” — it’s dictated by your tub’s position.
| Feature | Wall mount | Deck mount | Freestanding (floor) |
|---|---|---|---|
| Best tub type | Against-wall / alcove | Wide-rim / tiled ledge | Center-of-room |
| Tub rim clutter | None — rim stays clear | Faucet on the rim | None |
| Install difficulty | High if wall is closed | Moderate | Moderate–high (floor rough-in) |
| Typical fixture cost | $150–$450 | $120–$400 | $250–$900+ |
| Leak accessibility | Behind tile (hardest) | Under deck | Under floor |
| Cleaning ease | Easiest (nothing on tub) | Hardest (grime at base) | Easy |
If you already have a Roman-style setup or a specific brand valve, the valve family limits your trim options. For example, brand-specific systems like Delta Roman tub faucet valves pair with matching trim, so confirm compatibility before you fall in love with a finish.
What finishes and features actually matter on a wall mount tub filler?
The features that matter most are a solid brass valve body, a ceramic-disc cartridge (not rubber washers), a spout reach that clears your tub wall, and — if you want to rinse hair or the tub — an integrated diverter with a hand shower. Finish is about durability and matching your room, not just color.
On finishes, here’s the honest rundown:
- Brushed nickel: hides water spots and fingerprints best; the safest everyday choice.
- Matte black: dramatic and popular, but shows hard-water spotting and dust more.
- Chrome: cheapest, easiest to clean, but reads more “builder-grade.”
- Brushed gold / champagne bronze: warm and on-trend; verify it’s a PVD finish so it won’t wear off.
Ask whether the finish is PVD (physical vapor deposition) — PVD coatings resist scratching and tarnish far better than plated finishes and typically carry longer finish warranties. On the valve, insist on ceramic-disc cartridges rated to industry cycle-testing standards; they’re the difference between a faucet that stays drip-free for a decade and one you’re rebuilding in year two.
One flow note for 2026: tub fillers are exempt from the strict aerator flow limits kitchen and lavatory faucets face, because you want a tub to fill fast — a good filler moves around 5–7 GPM. Don’t buy a “low flow” filler and then wonder why your tub takes 15 minutes to fill.
FAQ
Can you put a wall mount faucet on any bathtub?
Almost — as long as the tub sits close enough to a wall for the spout to reach over the rim (generally within 6 inches) and the wall can house the valve and supply lines. Drop-in, alcove, and against-wall freestanding tubs all work. A tub floating in the center of the room needs a floor-mounted freestanding filler instead.
How much does it cost to install a wall mount tub faucet?
The fixture itself runs about $150–$450 for a quality unit. Installation is the swing factor: if the wall is already open during a remodel, labor might be $150–$350; if a plumber has to open and re-tile a finished wall, expect $500–$1,200+ once tile repair is included. That access cost is the single biggest reason to plan a wall mount during a remodel rather than after.
What’s the difference between a wall mount tub faucet and a tub-and-shower valve?
A wall mount tub filler just fills the tub — spout and handles, sometimes with a hand shower. A tub-and-shower valve adds a diverter that sends water up to a fixed shower head overhead. If you only ever bathe (no overhead shower), a filler is simpler and cleaner; if you shower too, you want the tub-and-shower valve.
Why is my new wall mount tub faucet dripping or leaking?
A drip from the spout usually means a worn or debris-fouled ceramic cartridge; a leak behind the wall points to a loose supply connection or a spout base that wasn’t sealed. Because a wall mount hides its plumbing, wall leaks need prompt attention. This guide on fixing a leaking bathtub faucet quick and easy walks through the cartridge fix, which handles the most common cause.
Do I need an access panel behind a wall mount tub faucet?
It’s strongly recommended. Building codes in many areas require access to concealed valves, and even where they don’t, a removable panel (in an adjacent closet or behind the wall) turns a future cartridge swap from a tile-demolition job into a 20-minute fix. Plan it in during rough-in — you’ll thank yourself later.
What spout reach do I need for a freestanding tub against the wall?
Measure from the finished wall to the inner edge of the tub, then add 2–3 inches so water lands well inside the basin. For a freestanding tub set 4 inches off the wall with a 4-inch-thick rim, you’d want a spout reach of at least 9–10 inches. Under-reaching is the most common wall mount regret.
The bottom line
A wall mount faucet for a bathtub is a design-forward, rim-clearing choice that pays off when your plumbing is (or will be) in the wall and your tub sits against it. Nail the rough-in height, the spout reach, and the pressure test, and you’ll have a filler that looks architectural and lasts for years. Force it into a finished wall with a center-of-room tub, and you’ll fight it. Match the fixture to your tub’s position first, then pick the finish.
About the author: This guide was written by the Arcora product team, who specify, test, and install bathtub and shower fixtures across residential remodels and new builds. We’ve bench-tested tub fillers for flow rate, cartridge cycle life, and finish durability.
About Arcora: Arcora designs and manufactures faucets, shower systems, and bathtub fixtures engineered to meet North American plumbing standards, with ceramic-disc cartridges cycle-tested for long-term reliability and finishes backed by our warranty. Explore the full range at www.arcorafaucet.com.